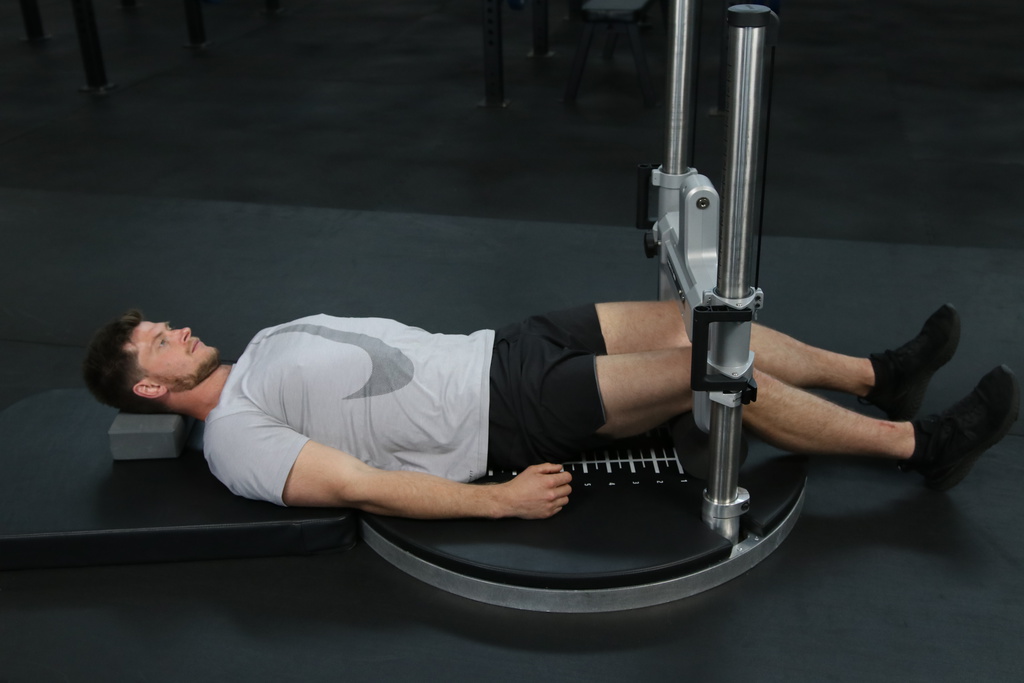
Hip Abduction
Setup
1: Lie supine, sacrum centred over the middle gridline on the base mat. Position hips at 30° flexion using a foam roller or similar.
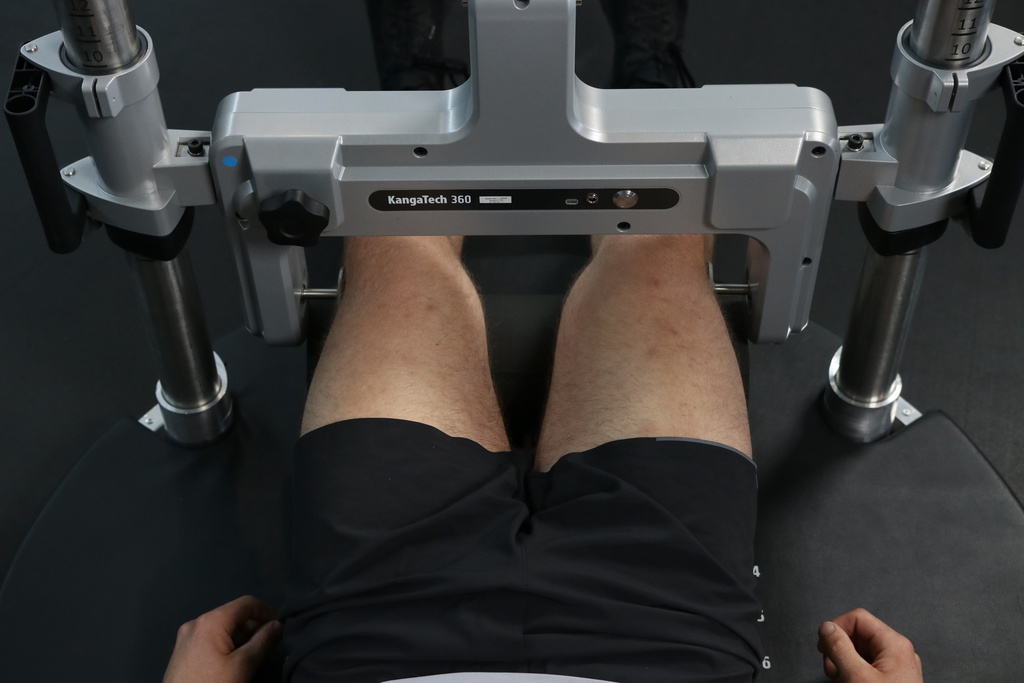
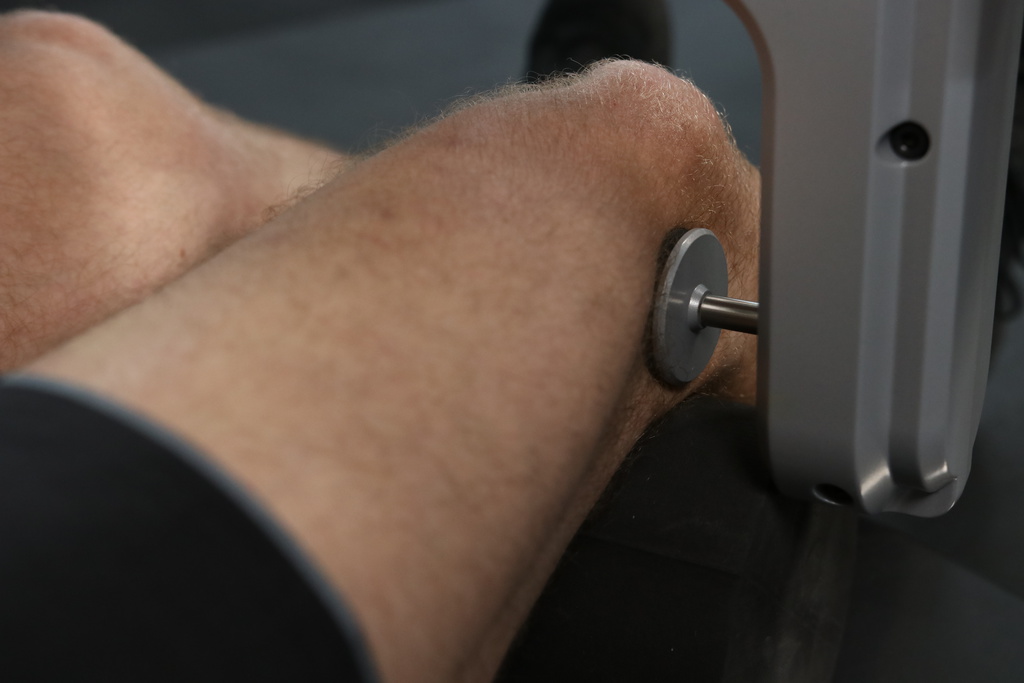
2: Adjust housing height to align flat sensor pads with the apex of the lateral femoral condyles. Feet in line with knees/hips and patella (knee caps) pointing to the ceiling.
3: Ensure the sensor arms are at right angles to the femur and stable on the gradual application of pressure
4: Movement of either sensor arm on the application of force indicates a. Incorrect contact point on lateral femoral condyles, or b. Sensor is not at right angles to the femur. Amend position and apply pressure to re-test alignment
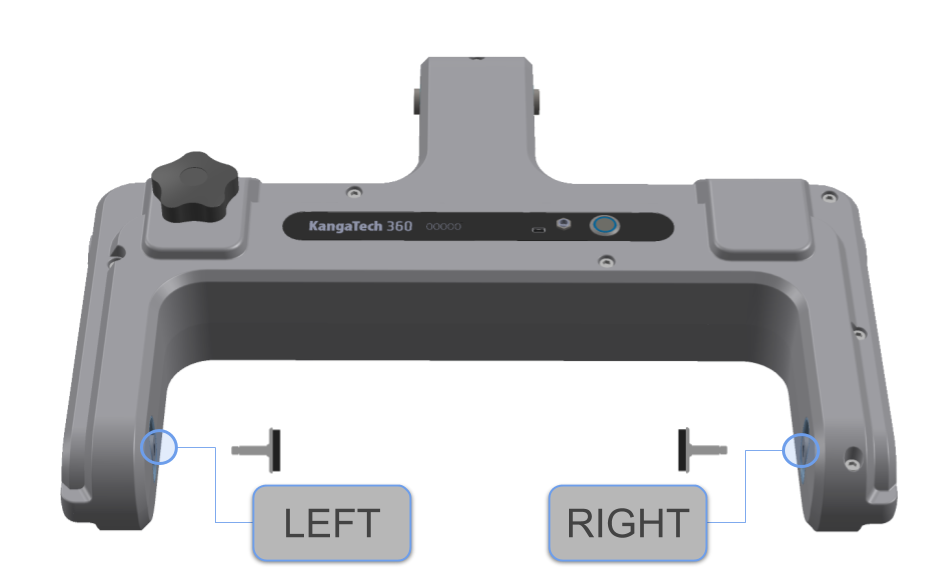
5: Record height of top of carriers for future reference
Cues
1: Test bilaterally
2: Squeeze into pads, separating upper thighs. Imagine turning knees out.
3: Maintain lumbar neutral, flat/still sacrum and keep the abdominal wall flat/hollow.
4: Discourage gluteal contraction (buttock squeeze)
5: Feel fatigue/work in the more posterior hip abductors (not TFL)
6: Build to maximum force over 5 seconds