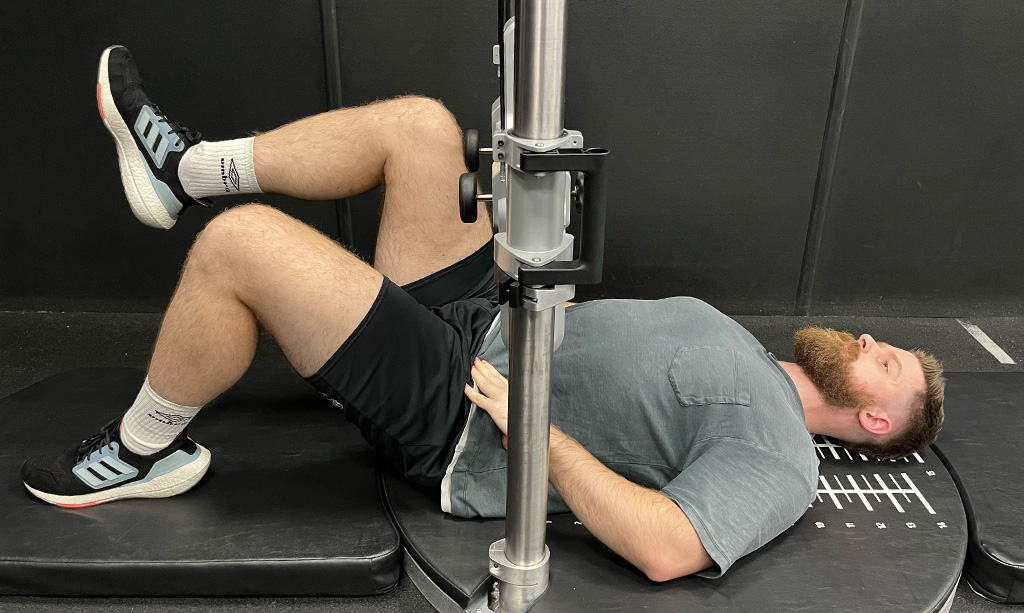
Hip Flexion 90
Setup
1: Lie supine, sacrum centred over gridline on base mat. Testing Hip at 90° (femur to match inclination of housing), contralateral hip at 60°, foot flat on the floor.
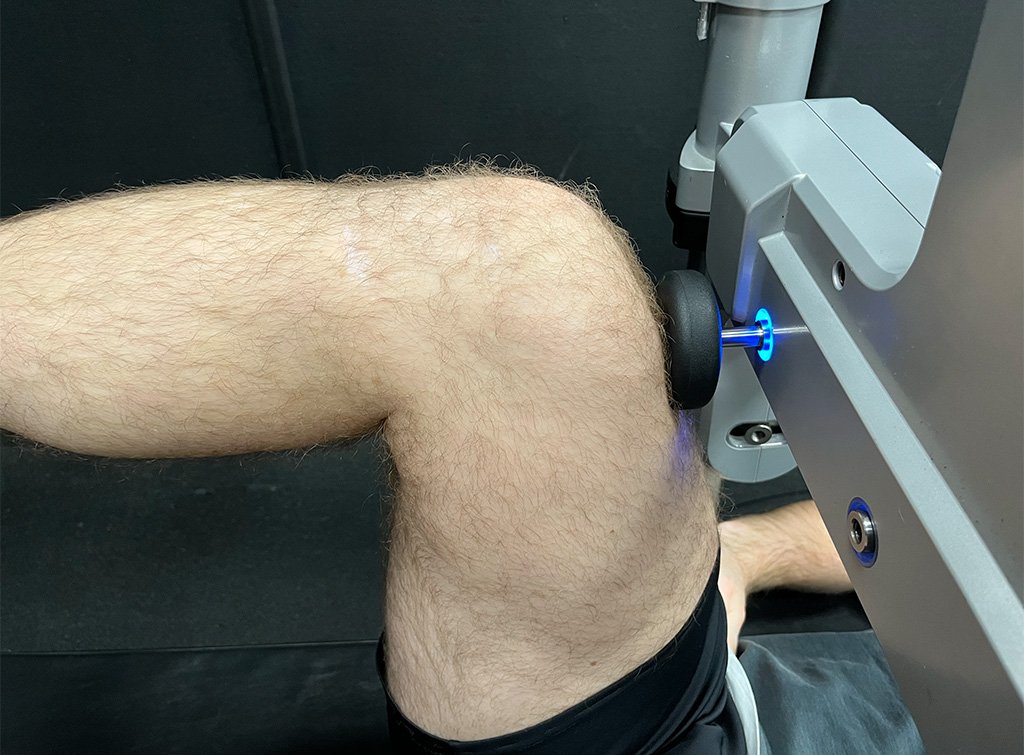
2: Adjust housing height to align flat pad with distal femur (immediately above knee cap).
3: Plane of femur should be parallel to housing to ensure hip flexed at 90°. Pad should make flat contact with distal femur and feel comfortable with application of pressure.
4: Record height of top of carriers.
Cues
1: Test unilaterally. Opposing leg's heel can apply counter pressure to floor.
2: Flatten abdominal wall and squeeze thigh into pad. Maintain lumbar neutral and flat/hollow abdominal wall. Opposing leg's heel can apply counter pressure to floor.
3: Visualise tensioning the psoas guy-wire between spine and inner thigh.
4: Maintain pelvic position - keep sacrum flat and spine neutral.
5: Monitor excessive transverse and sagittal plane and pelvic rotation.
6: Build to maximum force over 5 seconds.